
Blog
Can Diamond Painting Be Framed? The Complete Guide to Displaying Your Sparkling Art

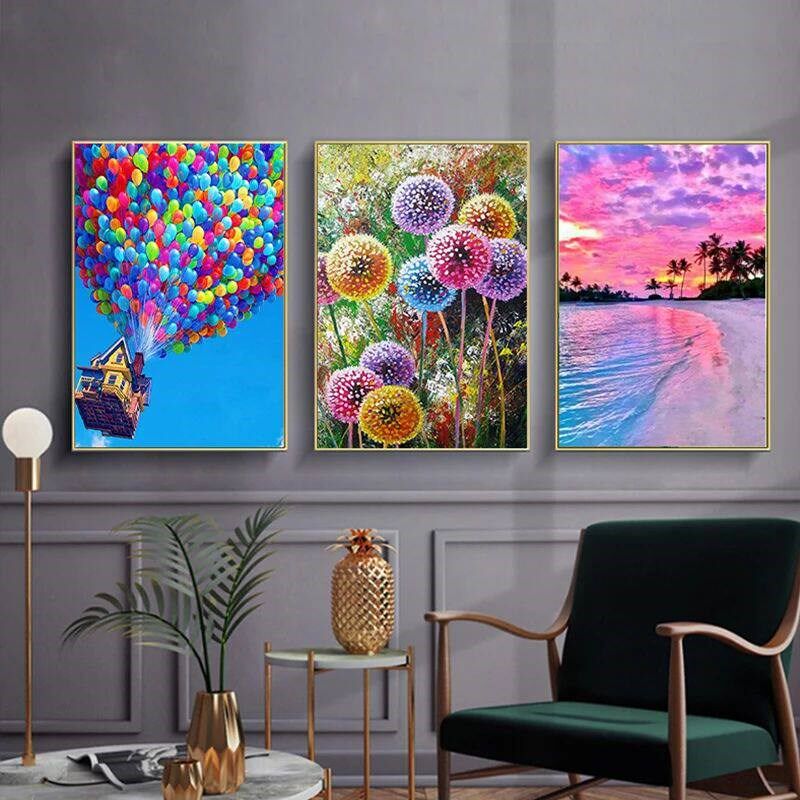
Yes — absolutely, you can frame diamond paintings. In fact, framing is one of the best ways to protect your finished piece and turn it into a polished, gallery-style display.
A good frame:
- Keeps the drills (diamonds) safe from dust and damage
- Helps the canvas stay flat and smooth
- Makes it easy to hang, gift, or even sell your artwork
Whether this is your very first completed kit or you’ve already finished a whole stack of paintings, this guide will walk you through the best framing methods, step-by-step instructions, and tips to choose the right style for your budget and skill level.
Quick Answer: Best Ways to Frame a Diamond Painting
Here’s a simple overview of popular framing methods and who they’re best for:
| Framing Method | Best For | Skill Level |
|---|---|---|
| Standard Photo or Poster Frame | Budget-friendly, quick display | Beginner |
| Floating Frame | Modern look, preserving sparkle and visible edges | Beginner to Intermediate |
| Stretched Canvas Wrap | Large pieces, 3D gallery effect | Intermediate |
| Magnetic Frame | Easy artwork swapping, no-damage display | Beginner |
| Foam Board Mounting | Sturdy, lightweight backing before framing | Beginner |
| Embroidery Hoop | Small partial-drill designs, creative look | Beginner |
| Professional Framing | Valuable or oversized pieces, archival quality | Leave it to the pros |
Close-up of a diamond painting being mounted onto foam board with adhesive, demonstrating the preparation step before placing the canvas into a frame.
Step-by-Step: How to Frame Your Diamond Painting
Step 1: Flatten and Prepare the Canvas
Before you think about frames, make sure your canvas is flat, clean, and smooth. Many canvases come rolled in a kit, so light creases or curls are normal.
To flatten your canvas:
- Weight method: Lay the canvas flat on a clean surface. Place heavy books or boards on top and leave them there for 24–48 hours.
- Gentle heat (use with care): For stubborn wrinkles, you can:
- Use a hairdryer on low heat about 30 cm (12 inches) away, moving it around continuously, or
- Place a thin cloth over the back of the canvas and gently iron on a low, no-steam setting.
Never iron directly on the drills or on the adhesive side of the canvas.
To clean the surface:
- Use a soft brush, lint-free cloth, or even a clean, soft toothbrush
- Gently brush away any dust or loose debris on top of the diamonds
A clean, flat canvas will sit much better in a frame and look more professional on the wall.
Step 2: Seal (Optional but Recommended)
Sealing is technically optional, but many diamond painters swear by it.
A clear sealant:
- Locks the drills firmly in place
- Adds a protective layer against dust and shifting over time
- Gives peace of mind if the piece will be moved, gifted, or shipped
If you’re framing behind Glass, sealing isn’t always necessary, since the Glass already offers protection. But if you prefer an open frame with no glass, sealing is strongly recommended — especially for pieces that will hang vertically on a wall.
How to seal:
- Use a sealant specifically designed for diamond painting or similar crafts.
- Brush-on and spray sealers both work — choose whichever you’re more comfortable with.
- Apply a thin, even coat, making sure you don’t flood the gaps between drills.
- Let it dry completely (usually at least 24 hours) before you start framing.
Step 3: Measure and Choose Your Frame
Accurate measurements will save you a lot of frustration.
- Measure the width and height of the finished diamond area.
- Ignore any extra printed border that you don’t plan to display.
Most kits follow standard sizes like 30 × 40 cm or 40 × 50 cm, which makes it much easier to use ready-made frames.
When choosing your frame, think about:
- Depth: Diamond paintings are slightly raised. Look for frames with a deeper lip or a shadow box profile — at least about 1.25 cm (0.5 in) — so the Glass (if any) doesn’t press down on the drills.
- Style:
- Simple, clean frames work well with modern or colorful designs.
- Ornate wooden frames pair nicely with classic or vintage-style art.
- Color: Match your frame to either:
- The main colors in your painting, or
- Your room’s existing decor and furniture
Step 4: Mount and Secure the Canvas
There are a few easy ways to secure your diamond painting in the frame. Choose whichever feels most comfortable for you.
1. Foam Board Mounting (Easiest)
This is a beginner-friendly method that gives your painting a sturdy backing.
- Cut a piece of foam board to fit snugly inside your frame.
- Use double-sided tape or strong craft glue to attach the canvas to the foam board.
- Start from one edge and slowly smooth the canvas down as you go to avoid air bubbles or wrinkles.
2. Stretching Over a Canvas
If you want a professional, three-dimensional gallery look:
- Get a blank artist’s canvas or stretcher bars in the same size as your painting.
- Center your diamond painting on top.
- Gently pull the edges around the back and staple or tape them to the wooden frame.
- Keep the tension even so the front stays smooth and flat.
You can hang it just like a regular canvas — no extra frame needed, unless you want one.
3. Using a Mat Board
A mat (or passe-partout) adds a clean, professional border:
- Use a mat board with an opening cut slightly smaller than your diamond area.
- Place the painting behind the mat so it frames the artwork and hides any uneven or frayed edges.
- Then place both into your frame.
This gives your piece a bit of breathing room and a polished finish.
Step 5: Finish and Display
Once your painting is mounted:
- Make sure the canvas sits evenly with no buckles or ripples.
- Attach or adjust hanging hardware if your frame doesn’t come ready to hang.
- Choose a spot where light can hit the diamonds — that’s where the sparkle really comes alive.
Try to avoid direct, harsh sunlight, as it can fade colors over time.
Glass or No Glass? How to Keep the Sparkle
This is one of the most common debates in the diamond painting community. There’s no single “right” answer — it depends on what matters most to you.
Framing without Glass (recommended for maximum sparkle):
Without Glass, the diamonds capture light from all angles, maintaining their full brilliance. Floating frames, stretched canvas wraps, and open frames all let the textured, shimmering surface shine unimpeded. However, the artwork remains exposed to dust and may require occasional gentle cleaning.
Framing with Glass or acrylic:
Glass protects against dust, moisture, and UV damage, and it keeps diamonds secure behind a solid barrier. The trade-off is that regular Glass can create glare or reflections that dull the sparkle. Some crafters find that standard Glass makes the diamonds harder to see, as it adds reflections and glare. To solve this:
-
Acrylic glazing: Lighter than Glass and less likely to shatter, acrylic is a popular alternative. Some acrylic covers feature anti-reflective or non-glare coatings that keep the diamonds bright without distracting reflections.
-
Anti-reflective Glass: Museum-grade or anti-reflective Glass reduces glare while providing protection. It is heavier and more expensive but offers the crispiest, most gallery-like clarity.
-
Shadow box frames: These provide extra depth so the Glass does not press directly against the diamonds.
Pro tip: If you use glass, ensure your frame has sufficient depth. The finished piece — canvas plus drills plus glazing plus backing board — may require a thicker frame profile than standard poster frames.
Creative and DIY Framing Options
Beyond traditional frames, the crafting community has developed many creative ways to display diamond paintings:
-
Embroidery hoop: Perfect for small partial-drill designs. Place the canvas between the inner and outer hoop rings, tighten, and trim the excess. Add pompom trim or decorative ribbon for extra flair.
-
Wooden serving tray: Glue your finished canvas to a decorative wooden tray or plaque. This doubles as functional decor for parties and entertaining.
-
Magnetic poster frames: These allow you to swap artwork in seconds without damaging the canvas. Look for models with strong magnets that can securely hold thicker canvases.
-
Hanging scroll: Attach a wooden dowel to the top edge and decorative trim to the bottom for a simple, glass-free wall hanging.
-
Stretcher bars: Stretch your diamond painting over wooden stretcher bars for a gallery-style finish that enhances the three-dimensional appeal.
Common Questions About Framing Diamond Paintings
Can I use a regular picture frame?
Yes, you often can.
Standard photo or poster frames work well as long as:
- The frame depth can handle the raised surface of the drills, and
- The backing closes properly without crushing the diamonds
You may need to remove the Glass if there’s not enough room. Many crafters prefer removing the Glass anyway, simply to let the sparkle shine more.
If you do want Glass and more space, look for shadow box frames or deeper profiles.
Will the Diamonds Fall Off Over Time?
They can, especially if:
- The canvas wasn’t sealed
- The adhesive has aged or wasn’t very strong
- The piece hangs vertically where gravity and vibration slowly work on the drills
Sealing your painting greatly reduces this risk. Even when framed behind Glass, drills can shift if they’re not well secured — so sealing is generally a good idea for any piece you care about.
Can I Frame a Diamond Painting That’s Bigger Than a Standard Frame?
Yes. You have a few options:
- If your canvas is just slightly larger than your frame, you can carefully trim the border with a craft knife and ruler on a cutting mat.
- If your frame is larger than your canvas, you can:
- Use colored or patterned craft paper around the edges
- Paint the visible area of the backing with acrylic paint
- Add a custom-cut mat board to fill the extra space neatly
For very large or unusual sizes, a custom frame or professional framer may be the best solution.
Should I Frame Behind Glass or Leave It Open?
It mainly comes down to your priorities:
-
Choose glass/acrylic if:
- You want maximum protection against dust, moisture, and UV fading.
- The piece will hang in a high-traffic or dusty area.
- You’re willing to invest in better glazing (like anti-reflective or acrylic) to reduce glare.
-
Choose open framing if:
- You want the highest possible sparkle and 3D texture.
- You don’t mind occasional light cleaning.
- You love seeing and feeling the tactile surface of the drills.
Also keep in mind:
- Square drills that fully cover the canvas tend to accumulate less visible dust in gaps.
- Round drills leave small spaces between them where dust may be more noticeable over time.
Why You Can Trust These Tips
The framing methods and suggestions in this guide are based on widely used techniques in the diamond painting community. They reflect best practices shared by leading brands and experienced crafters, including:
- PaintbyDot
- DotzPainting
- Multiple dedicated diamond painting blogs, forums, and tutorial sites
For especially valuable, sentimental, or irreplaceable pieces, it’s always a good idea to visit a professional framer. They can assess your specific canvas, recommend archival materials, and help you choose a presentation that keeps your sparkling art safe and beautiful for years to come.